How to Break Down Any AI Image's Prompt in Seconds (Midjourney, Flux)
Published October 28, 2026 · 6 min read
You open Discord or a gallery and one image stops you: the light, the texture and the framing are exactly what you wanted. The usual next move is to squint at it and guess. You type "cinematic portrait, soft light", get something nearby, and tweak for an hour.
The problem isn't your eye. An image is a result, and a result hides which decisions produced it. Splitting it into separate decisions is much faster than guessing at the whole thing.
Why guessing one long prompt doesn't work
A finished image bundles independent choices: who is in it, how it was made, how it is lit, how it is framed. If you guess them all at once, a miss anywhere (the lens feel is wrong, the light is too hard) sends you back to rewrite everything, and you can't tell which part you got right.
Break the image into atoms
mysnipbox sorts what a vision model sees into six fixed categories, so the result always has the same shape:
| Category | The question it answers | Example tokens |
|---|---|---|
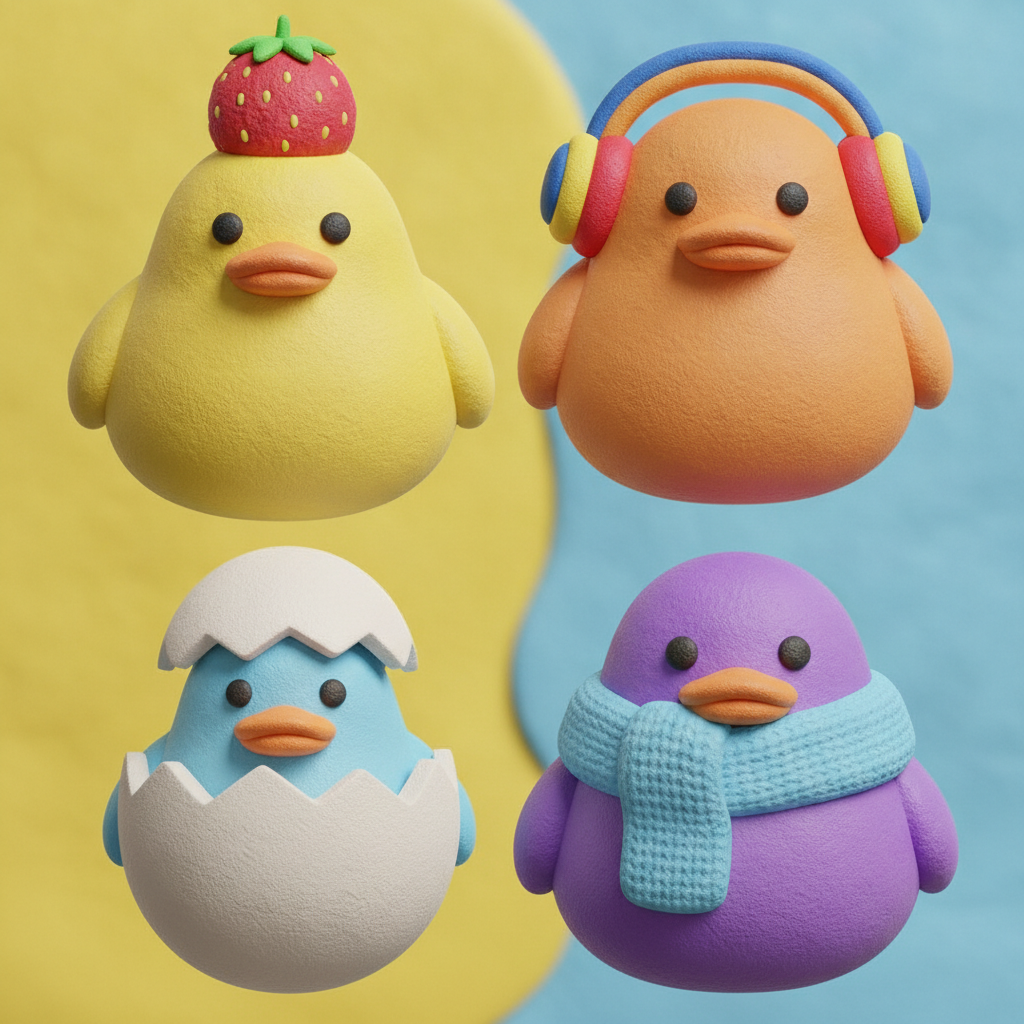
| Subject | Who or what is in the image? | chubby round bodies |
| Style & Medium | How was it made? Render type, material feel, lens | claymation texture, 85mm lens photo |
| Action & Pose | Pose, gaze, camera angle and composition | front view, centered composition |
| Attire & Details | What it wears or carries, small physical details | knitted blue scarf |
| Environment | Backdrop and setting | seamless studio backdrop |
| Lighting & Palette | Light, shadows and colors | soft studio diffusion, vibrant pastel palette |
"Camera" in the everyday sense (angle, framing) lives under Action & Pose; the lens and photo style live under Style & Medium. See the full list in Tag categories.
Here is what that does to a prompt. The first version is one string you can only copy whole; the second is the same idea as parts you can mix:
cute claymation ducks in a 2x2 grid, knitted scarf, strawberry hat, soft studio light, pastel colors, front view, 3d render
- Subject:
four cute duck characters,chubby round bodies - Style & Medium:
3d digital render,claymation texture - Action & Pose:
front view,centered composition - Attire & Details:
strawberry hat,knitted blue scarf - Lighting & Palette:
soft studio diffusion,vibrant pastel palette
Do it in four steps with mysnipbox
- 1Add the image. Drag it into the window or paste it. If Auto-Decompose on Import is on in the settings, the analysis starts as soon as the image lands; otherwise run Decompose from the inspector.
- 2Let a vision model read it. You choose the model: a cloud model with your own API key (Gemini, OpenAI or Claude), or a local model through Ollama so the image never leaves your computer. A cloud provider receives the images you analyze, so use a local model for confidential references. See Providers and Local models.
- 3Read the result by category. Every tag is sorted into the six rows above, so you can scan the lighting without wading through the subject.
- 4Click the tokens you want into the Prompt Basket. Tags sit in rows by category, you can drag them to reorder, and the finished prompt updates as you work.
Subject
Style & Medium
Attire & Details
Environment
Lighting & Palette
An analysis normally takes seconds with a cloud Flash model; a local model depends on your GPU or Apple Silicon memory. Either way, you read a structured result instead of one block of text.
Inspector · Subject
Prompt Output
a {subject} forging a blade in a dim workshop, wearing a {color} leather apron, cinematic lighting, 35mm lens, volumetric fog, hyperdetailed
Swap {subject} and {color} per render — everything else in the template stays locked.
{variable} slots come together in the Prompt Basket, with the assembled prompt shown below.Reuse one layer, swap the rest
This is where splitting pays off. Say you love the light of the reference but want your own subject. Keep the Lighting & Palette tokens and replace the rest:
soft studio diffusion, subtle contact shadow, vibrant pastel palette
a ceramic teapot with a knitted cozy, 3d digital render, claymation texture, front view, soft studio diffusion, subtle contact shadow, vibrant pastel palette
If you do this often, turn the part that changes into a variable such as {subject} and save the basket as a template. The output format is yours too: comma-separated, or underscore or hyphen joined for tools that expect tag-style input. More in Prompt Basket & templates.
What this can and can't tell you
- It describes what the image looks like, in prompt vocabulary. It does not recover the creator's original prompt, seed, model version or parameters such as
--aror--sref. - Treat the tokens as a strong starting point: generate, compare with the reference, then adjust one layer at a time.
- If a result looks thin, use Re-decompose with Vision LLM with a stronger model, or raise Tag Extraction Density (Simple, Detailed or Ultra-Detailed) in the settings.
- Learning a look is not permission to copy someone's work. Use references to understand what works, then make your own.
Which model should read your images?
Any vision model handles Midjourney and Flux outputs. If you want a free cloud option, read how to get a free Gemini API key and set it up. If you want everything on your own machine, read how to reverse-engineer prompts locally with Ollama.
Summary
Stop guessing at one long string. Split the image into subject, style, camera, lighting and palette, keep the layer you like and swap the rest. Download mysnipbox for macOS & Windows, or try the flow with sample images in the browser demo.